Disclaimer: The technical statements, support, information and recommendations contained herein are believed to be accurate as of the date hereof, but 1st-line Equipment, LLC does not make representations or warranties, express or implied, as to its accuracy, its completeness, or the results to be obtained. The information is being provided for informational purposes only and is intended for use by persons having adequate skill and expertise regarding the proper selection, use and application of the products and recommendations and at their own risk and discretion.
1st-line Equipment, LLC is not responsible for any injury or damages from such information. Please note that parts are available for purchase from 1st-line Equipment, LLC self service parts portal. These parts do not include any technical support. If you're unfamiliar with the technical aspects of repairing equipment, please contact a professional for proper evaluation.
By continuing to read further, you agree to abide by all the terms and conditions on this website. If you disagree, please leave our website.
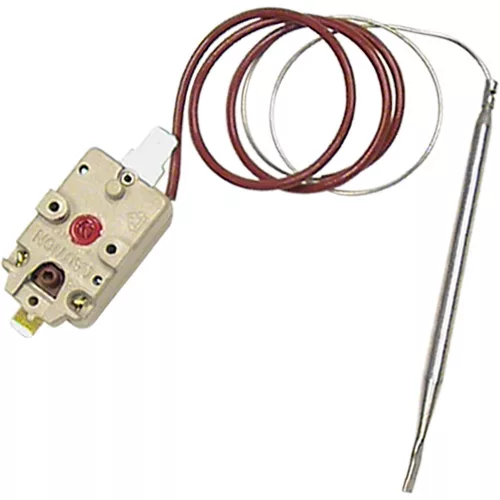
There are three types of Elektra resettable safety thermostats – one with a yellow cap on the base and two without.
If a Semiautomatica machine, please unplug and remove water from top basin.
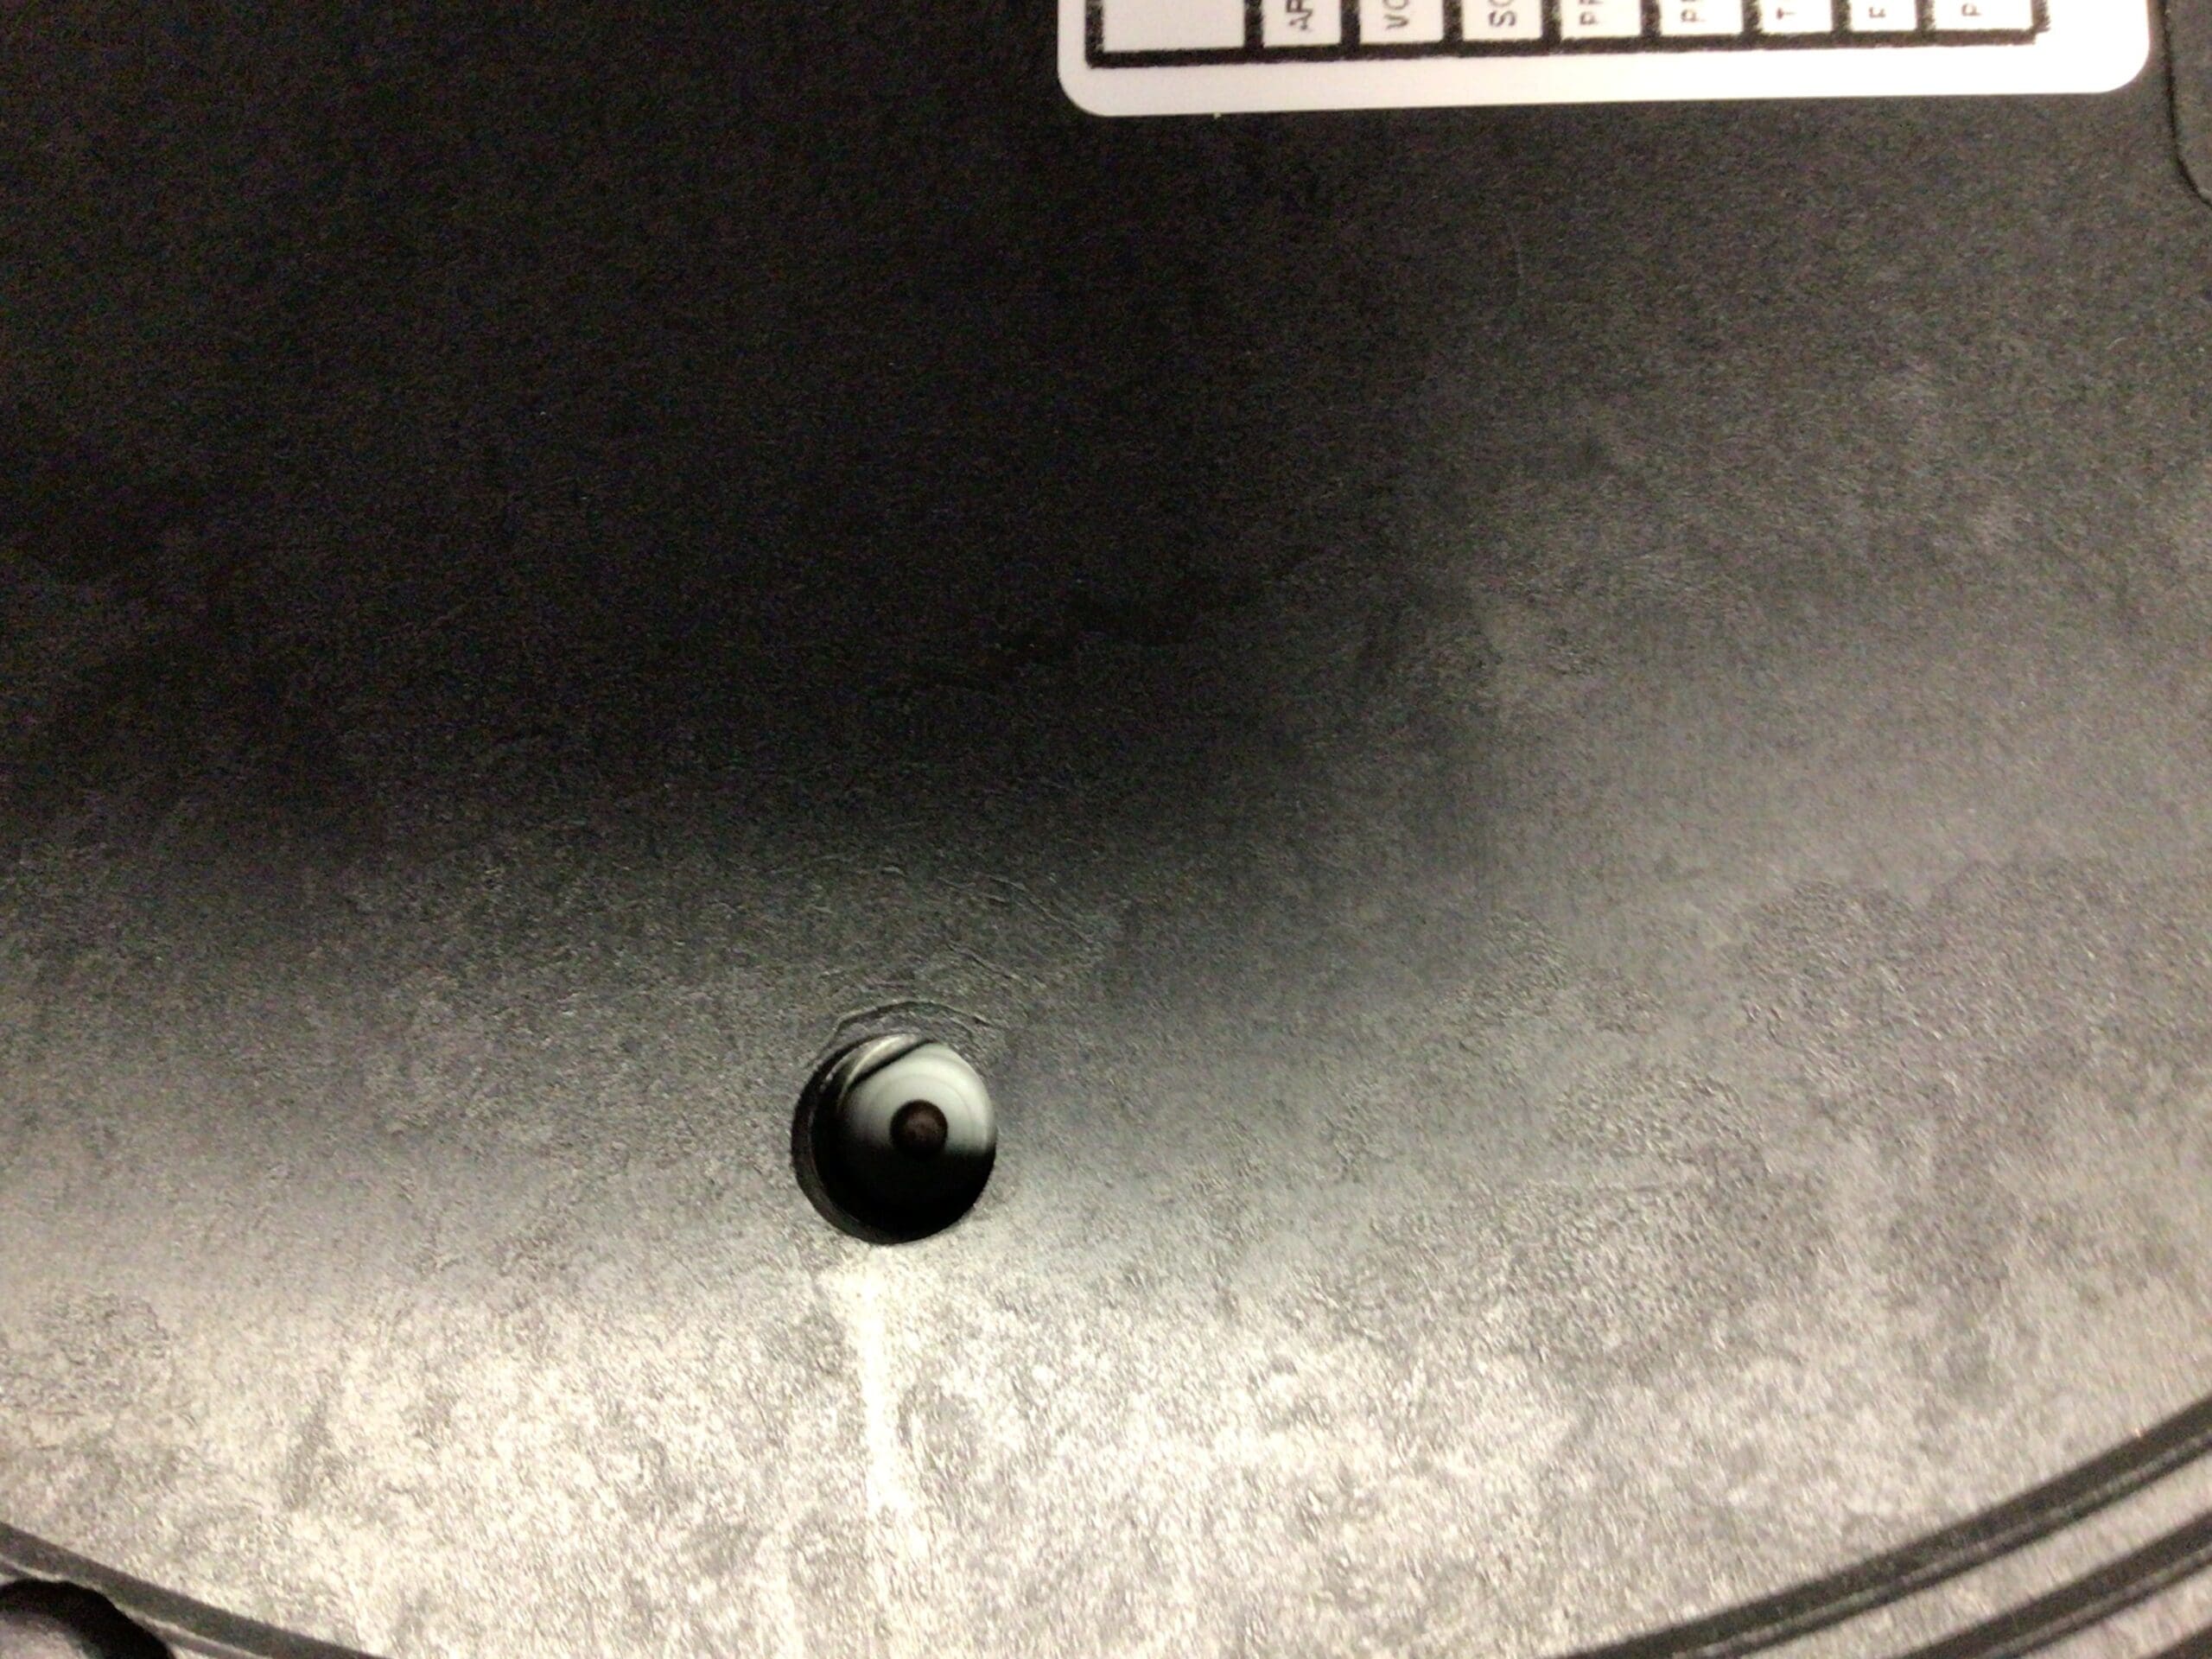
If there is a yellow cap under the base, remove it and get a pen to reset the safety thermostat
If no yellow cap, then unplug the machine, remove the screw under the drip tray with a short stubby philips screw driver, lay the machine on its side on a towel, and peel the bottom cover from the back of the base using a thin flat head screwdriver pressed against the plastic perimeter sticking out. This should be done at the back of the base in case you scratch the base bottom. Once you get a small slot started between the metal base and the plastic indentation, you can insert a larger flathead into the space and then twist the screwdriver to extend the space wider through out the base. Remove the plastic base and insert the drip tray screw in its spot so you do not lose it.
Position the machine laying down so that the front face or grouphead is facing your ceiling.
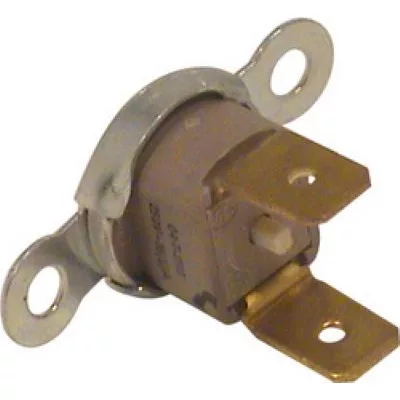
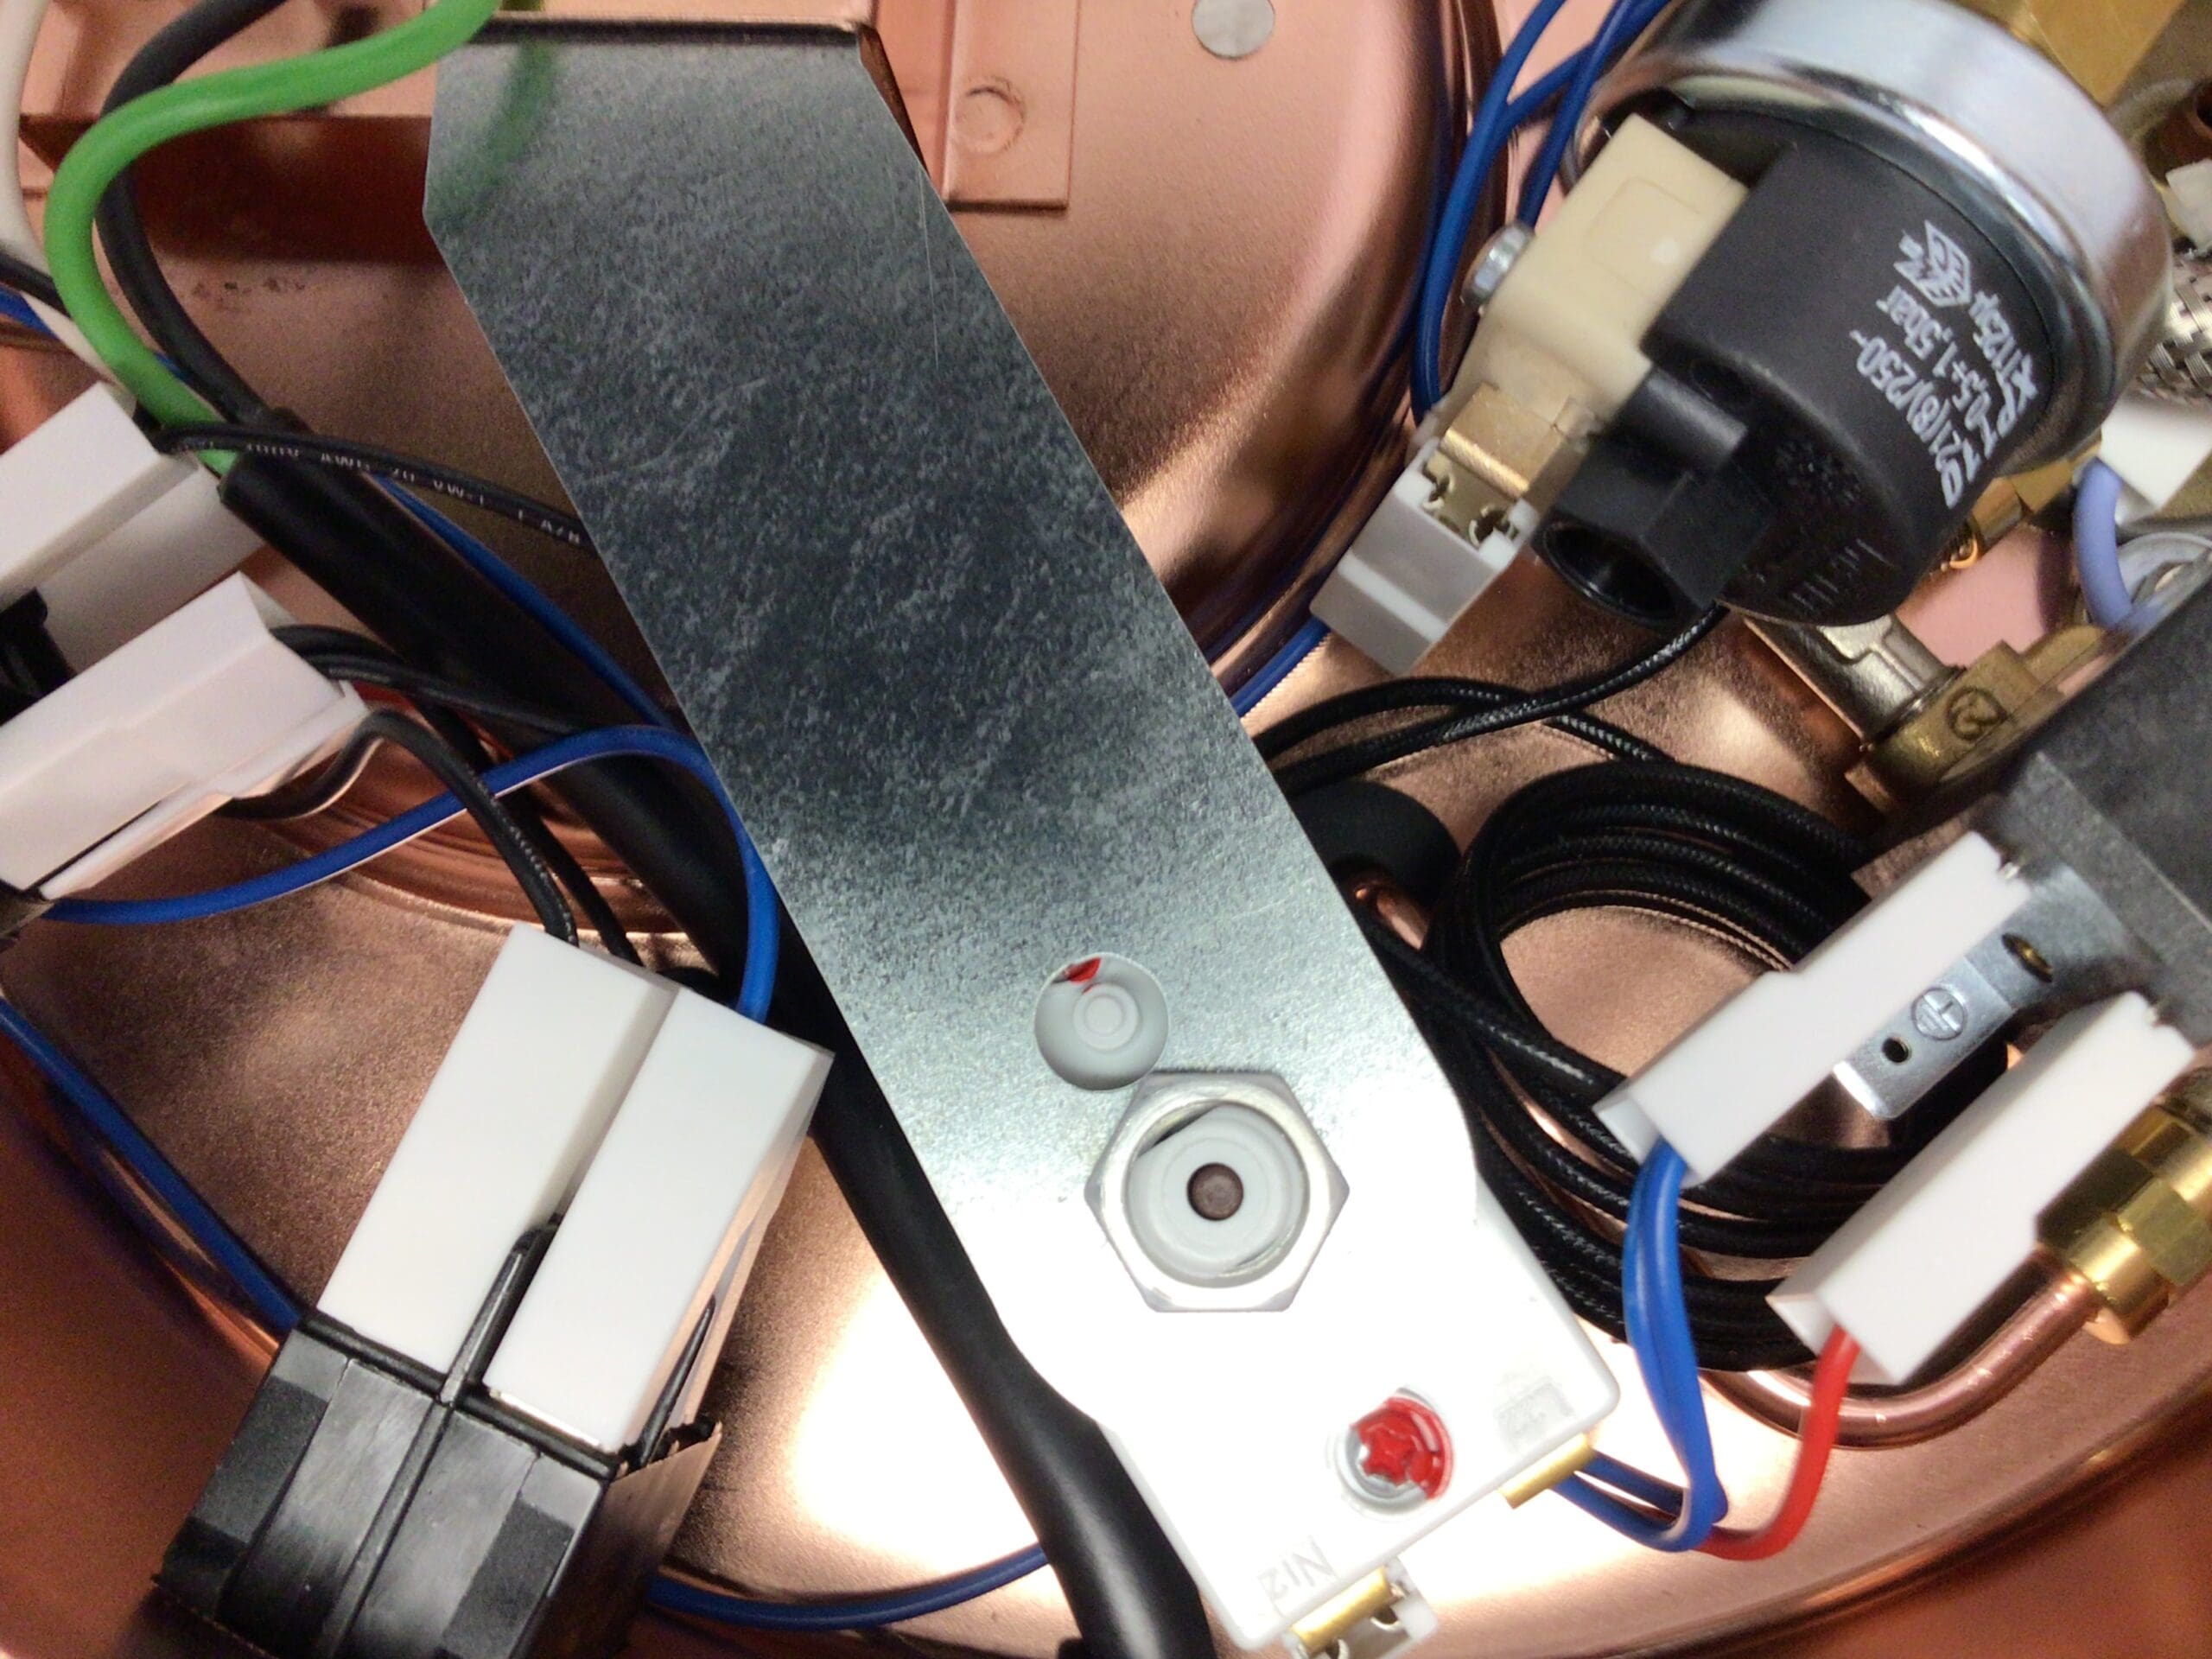
In the bottom base where the boiler sits (6 o’clock position), you will see 2 heating element posts coming out of a 2-3 inch circular brass plate that is indented from the entire base. In that same section, you will see a brown thermostat with 2 electrical connections. Sometimes, this brown thermostat is hidden under a copper tube. In between these connections, you will see a white push button. Push this in and feel for click. If you feel a click, reassemble the unit and test. If you feel no click, you will
Please note the above information is subject to copyright. It cannot be published by any means without the expressed written consent of 1st-line Equipment, LLC.