
Bulb Change – Elektra a Leva & Semiautomatica
Disclaimer: The technical statements, support, information and recommendations contained herein are believed to be accurate as of the date hereof, but 1st-line Equipment, LLC does not make representations or warranties, express or implied, as to its accuracy, its completeness, or the results to be obtained. The information is being provided for informational purposes only and is intended for use by persons having adequate skill and expertise regarding the proper selection, use and application of the products and recommendations and at their own risk and discretion.
1st-line Equipment, LLC is not responsible for any injury or damages from such information. Please note that parts are available for purchase from 1st-line Equipment, LLC self service parts portal. These parts do not include any technical support. If you're unfamiliar with the technical aspects of repairing equipment, please contact a professional for proper evaluation.
By continuing to read further, you agree to abide by all the terms and conditions on this website. If you disagree, please leave our website.
- Unplug the machine and let it cool.
- For the Microcasa Leva, leave the water in the boiler.
- For the Microcasa Semiautomatica, empty the water from the top basin only.
- Remove the screw under the drip tray with a 1/4″ socket driver with a Philips head screwdriver.
- Lay the machine on its side on a towel and peel the bottom cover from the backside.
- Once inside, remove the 2 wires from the affected light. There is a nut that needs to be unscrewed and slid off the light. The light then comes out the front outside.
- Slide the new light in and put on the holding nut.
- Put the wires in place (order does not matter).
- Put the base back into place.
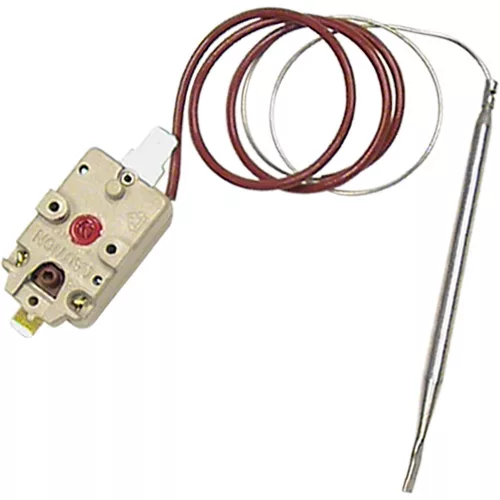
- Try to get a porthole in line with safety reset which looks like the one pictured and is the brown portion.
- Stand the machine up and press on the base in a downward motion to create a friction seal.
- Put the screw under the drip tray back in place creating a firm seal to disallow water to enter. Be careful not to over-tighten.
Please note the above information is subject to copyright. It cannot be published by any means without the expressed written consent of 1st-line Equipment, LLC.