Adjusting OPV – Fiorenzato Bricoletta / Volante

Unplug the machine and let it cool before starting. Take off the top screws. On tank models, there are 2 screws near the top front. On direct connect models, there is 3rd screw on the back top cover.
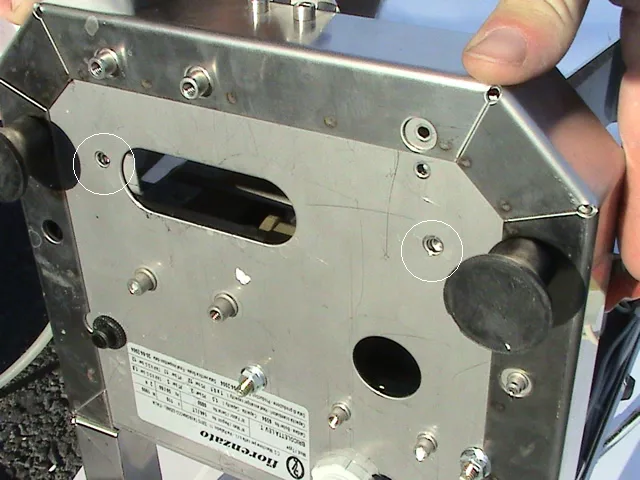
Tank model only: After removing the water reservoir and unplugging the machine, lay the machine on the front side. Between the back feet, you will see 2 Allen key screws. We have placed small circles in white to show their position. The inside wall where the water reservoir sits can be removed. You may have to press the wall inwards so the metal under the water tank seat can come out.
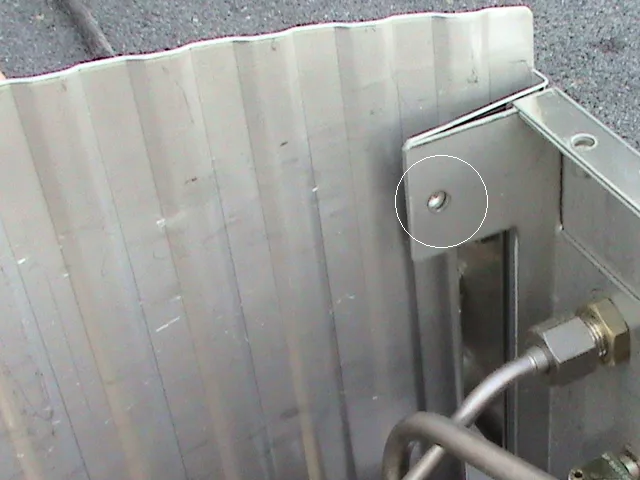
In the top front corners of the machine, you will see an allen key screw facing outwards. These need to be removed.

On the back panel, remove the gold screw. The entire side panel then lifts upwards for complete access to the inside of the unit.

On the back frame, there are 2 Allen key screws that need to be removed. These are holding the water tank seat which needs to be pushed aside. Right above the water tank seat in the picture, the OPV lays on the floor. You will need a 23 mm wrench or adjustable on the outer nut attached to the vinyl hose. Another adjustable needs to hold the OPV body. With the 23 mm wrench starting at the frame, you turn it upwards to the boiler. Once removed, you will see 2 slots inside. Using a 1/8″ flat-head screwdriver, you need to turn the slots counterclockwise so that the OPV opens at lower pressure. Turn it clockwise to increase the pressure needed to open the OPV. We do not know how much each full rotation relates to bar pressure. To test, you need to tighten the end cap back on with the vinyl hose. Sit tank seat in place and place full water tank in place to activate microswitch and test. When turning unit on for testing (does not have to be hot), please be very careful to not touch any electrical contacts. Please clean and dry all water before plugging in to avoid electrocution.
If you are cleaning the boiler refill control valve, here are the instructions:
Once you see the yellow box in the last picture, you need to remove the nut below it, slide off the black box off the shaft and then remove the shaft. If this is too difficult, then remove the connections from the elbow on the left side first and work your way to the right.
Boiler not allowing water to flow – In the shaft, you will see a small orifice or pinhole that may be blocked. This needs to be cleared. If you removed everything, you would be able to blow air from both sides of the brass piece that the shaft is connected to (when the shaft is removed).
Boiler not stopping boiler to refill or boiler is overfilling (this is after you checked the inline water pressure to be under 45 pounds) – This valve is probably sticking open and allowing the boiler to overfill. If the machine is refilling even when it is powered ON or OFF, there is definitely some particles that are keeping the valve open. If it ONLY happens when powered ON, then it is a water problem or a brain unit problem. The machine would have to be sent in.
Please note the above information is subject to copyright. It cannot be published by any means without the expressed written consent of 1st-line Equipment, LLC.