Disclaimer: The technical statements, support, information and recommendations contained herein are believed to be accurate as of the date hereof, but 1st-line Equipment, LLC does not make representations or warranties, express or implied, as to its accuracy, its completeness, or the results to be obtained. The information is being provided for informational purposes only and is intended for use by persons having adequate skill and expertise regarding the proper selection, use and application of the products and recommendations and at their own risk and discretion.
1st-line Equipment, LLC is not responsible for any injury or damages from such information. Please note that parts are available for purchase from 1st-line Equipment, LLC self service parts portal. These parts do not include any technical support. If you're unfamiliar with the technical aspects of repairing equipment, please contact a professional for proper evaluation.
By continuing to read further, you agree to abide by all the terms and conditions on this website. If you disagree, please leave our website.
Installation Using BWT Filter System

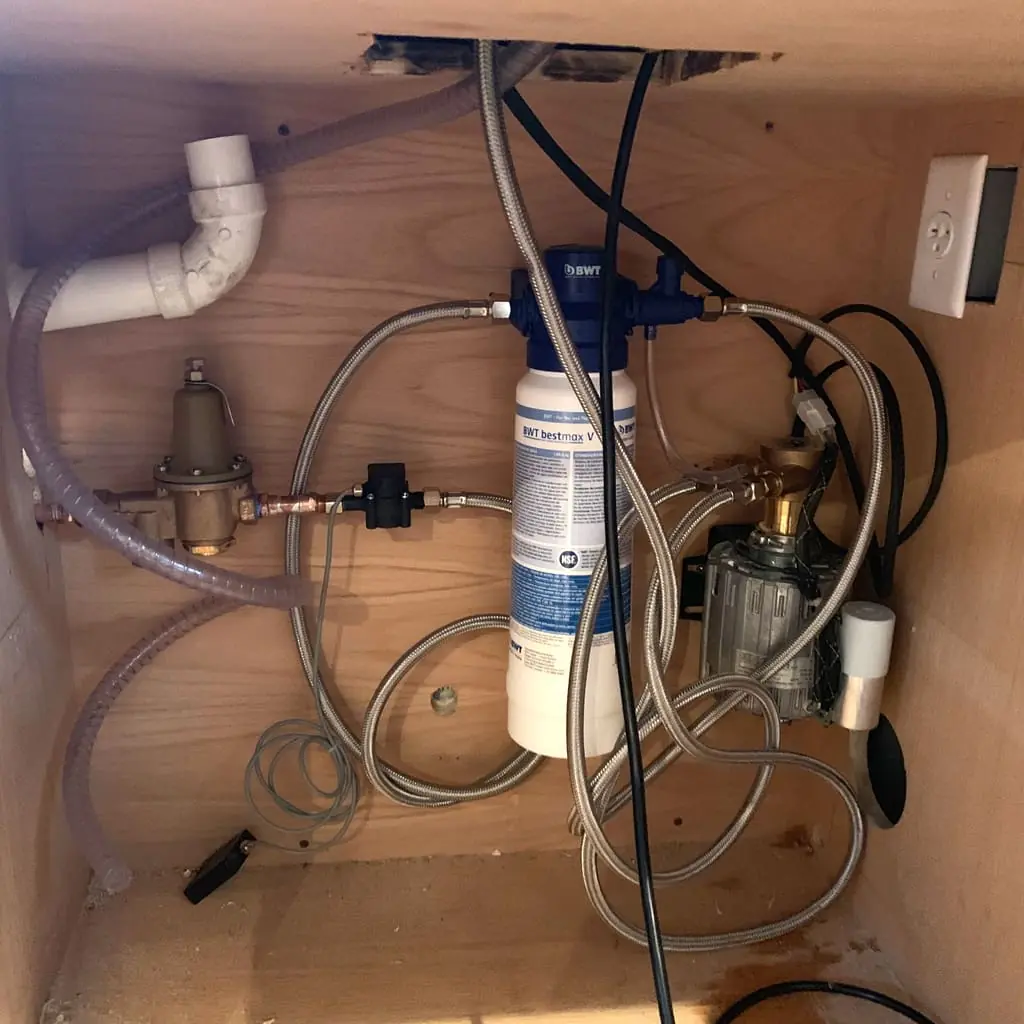
Review the picture to the right. The installation looks right, but it needs improvement.
First, there is back flow preventer and pressure regulator to control the water pressure. However, a good idea is to have a water pressure gauge installed after the pressure regulator. This is backup to make sure the regulator is working.
BWT supplies a water flow Aquameter. This should be installed immediately before, but preferably after the filter head. The reason is that only filtered water will go through this meter and have less chance of clogging it up. The Aquameter can be snaked to the top of the counter to be viewed or it can be secured to the inner wall.
The blue flush valve on the right side of the filter head is in a good spot. However, the hoses below should be cleared so that a buck can be placed under the small drain hose. 3 gallons of water need to be flushed to clear out any paper sediment from manufacturing. This paper sediment, which can be found on most filters, can clog the little pin holes, know as orifices and gicleurs, inside your espresso machine.
The machine drain hose is snaked from the top of the counter hole to the white PVC pipe. The white PVC pipe has a good angle drop. It looks like it is dropping more than 1″ for every 12″ across. However, the PVC pipe would be better if run further up towards the hole in the countertop and have a less run of the vinyl drain hose.
On most machines, the pump and motor (right side wall) are inside the machine. In this case, the pump and motor are outside and placed under the counter. The pump and motor should be placed higher than the water source. The reason is in case of a leak, the electric motor is at the highest point.
In addition, the pump on the motor should be on the bottom of the boiler. Again, if the pump breaks a seal and leaks water, it will drip down away from the motor being on top.
Lastly, all the hoses and wires should be neatly routed and secured. It makes it easier to figure things out.
Please note the above information is subject to copyright. It cannot be published by any means without the expressed written consent of 1st-line Equipment, LLC.