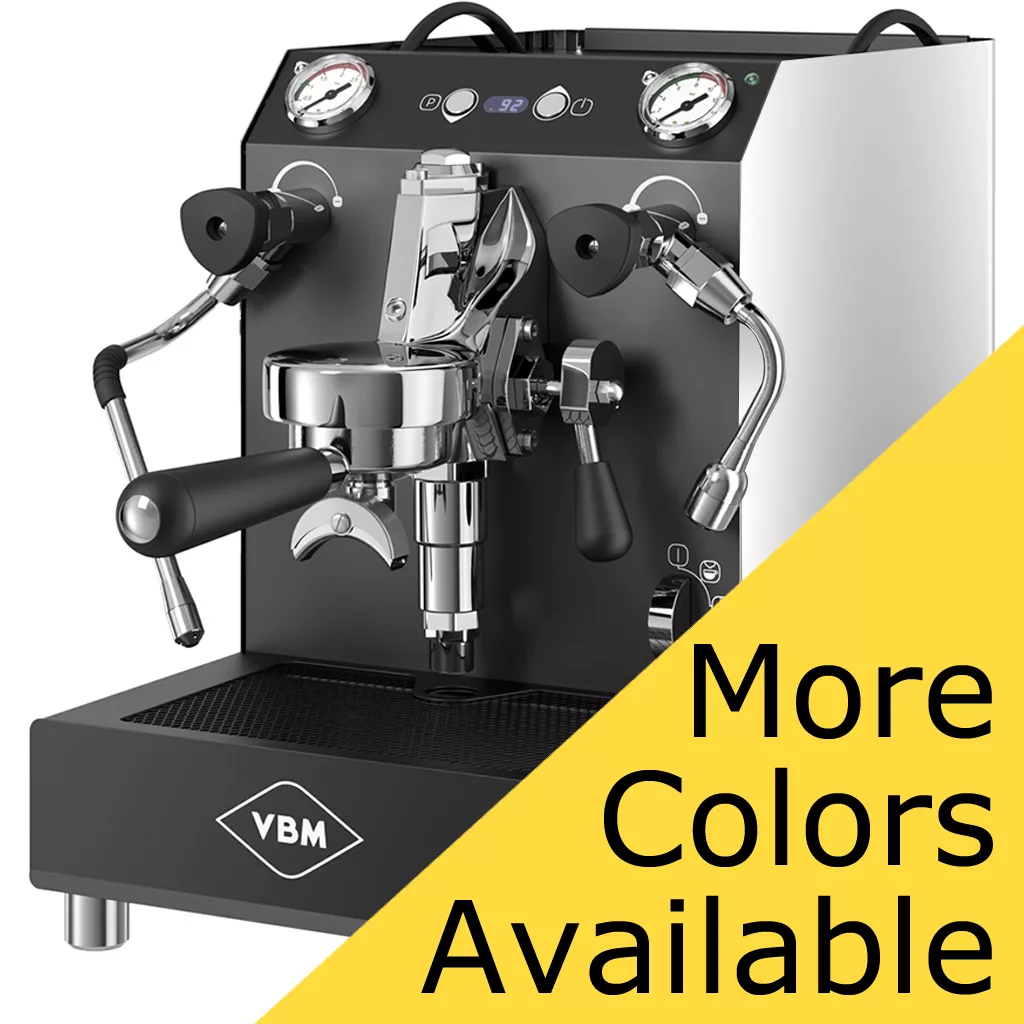

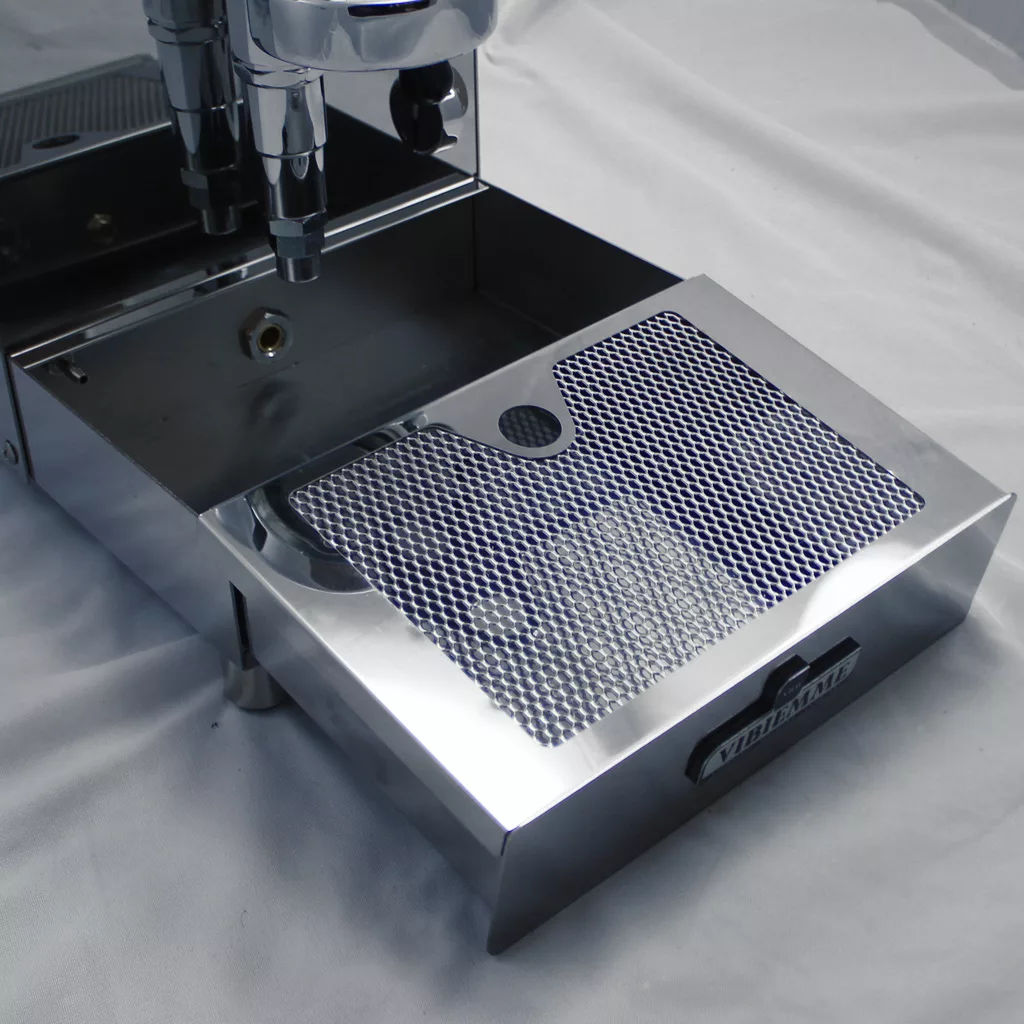


DISCONTINUED VBM Domobar Super V4 Dual Boiler PID Switchable Espresso Machine
| Brand | VBM (Vibiemme) |
|---|---|
| Height (inches) | 16, approximate |
| Width (inches) | 11, approximate |
| Depth (inches) | 20, approximate |
| Weight (pounds) | 84 |
| Wattage (watts) | 1600 |
| Voltage (volts) | 110 |
| Boiler capacity (liters) | Coffee – 0.5, Steam – 1.9 |
| Portafilter size (mm) | 58 |
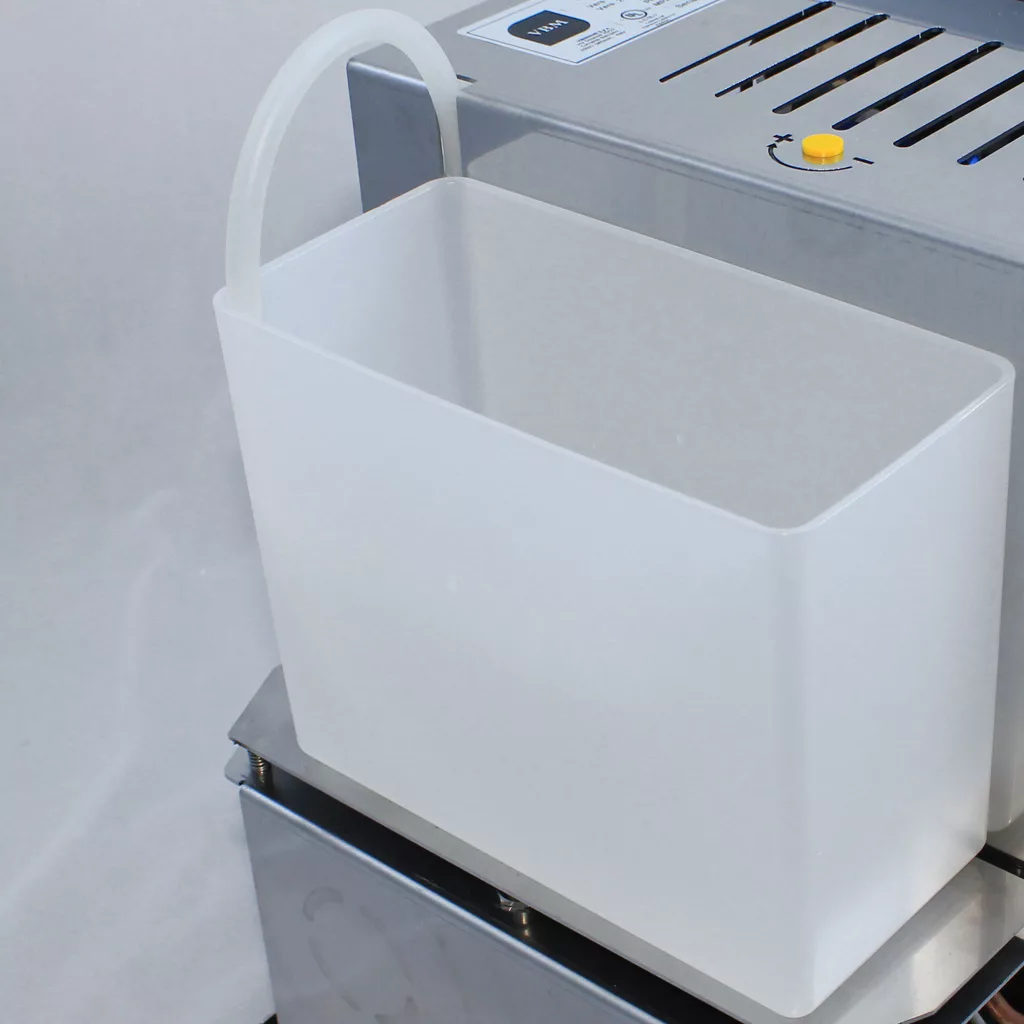
| Tank capacity (liters) | 2.1 |
| Country of manufacture | Milan, Italy |
| Approvals | UL |
Espresso Machine Warning:
- ELECTRICAL WARNING: To avoid electrical damage to this espresso machine which is not considered a manufacturer's defect, please acquire and install a single-outlet surge suppressor rated at 1080 joules or higher. the lack of the recommended surge suppressor, the espresso machine can be damaged at the power switch, the electronics, the heating element, the pressurstat or the wiring inside.
- WATER WARNING: To increase the useful life of and not damage your espresso machine, please use softened water. Softened water is water without calcium and without magnesium, but still has other minerals for espresso extraction. Do not use distilled water, purified water, nor reverse osmosis water as these types of water create oxidation with the metals and cause the same damaging effects as limescale.
- DESCALING WARNING: We do not recommend descaling unless there is an issue with the espresso machine. The reason is that too much descaling can eat away at the metals and gaskets inside an espresso machine.
- Shipping: Please note this machine ships on a pallet with curbside delivery only. It is just too heavy for UPS or FedEx to handle properly with the care you deserve on a high end purchase.
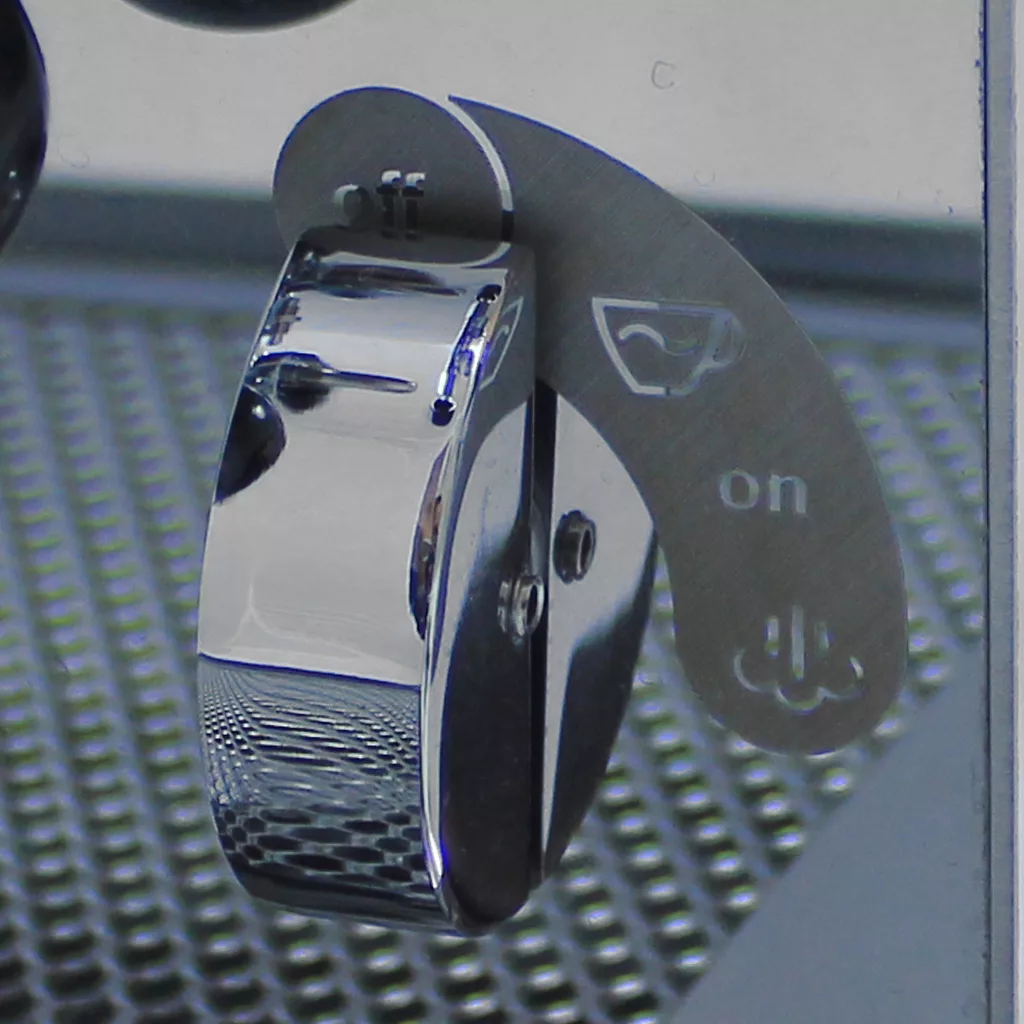
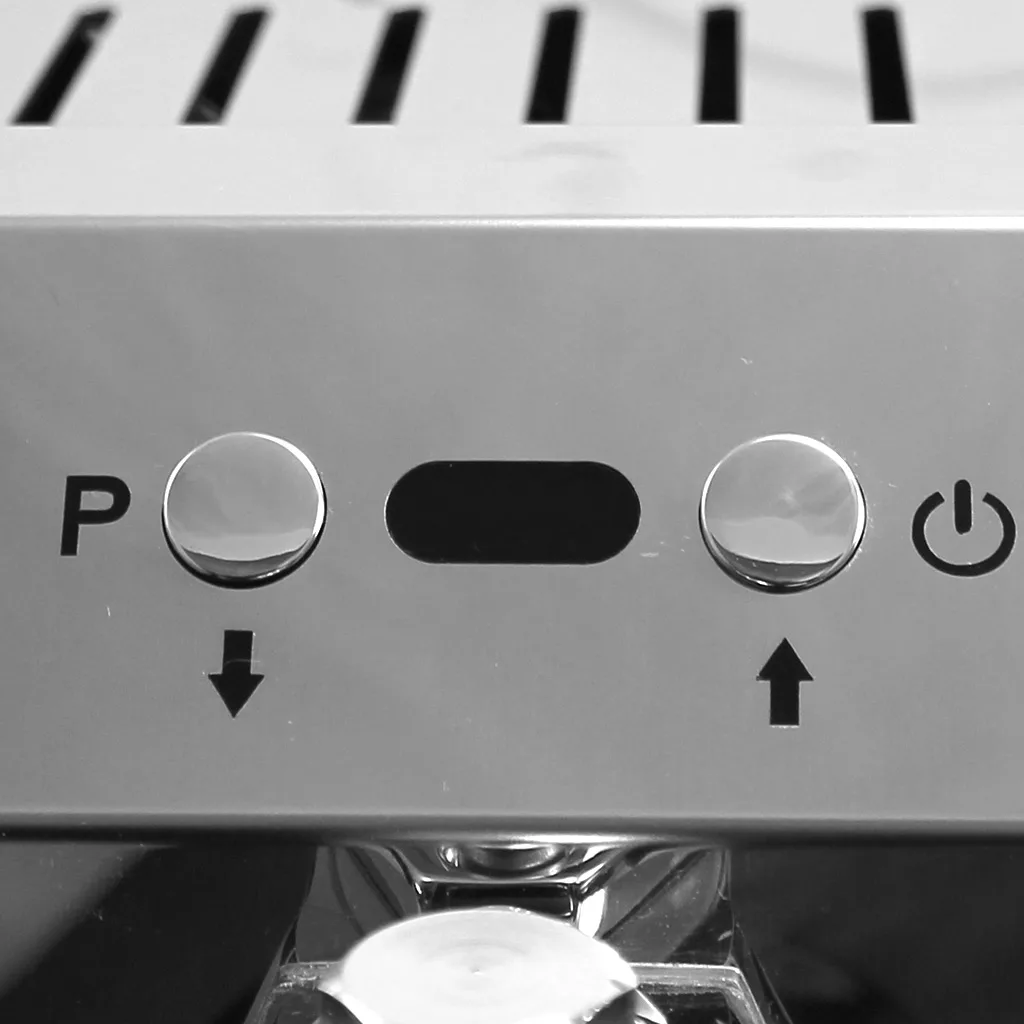
- Switch stages: To avoid any confusion on the operation of the machine:
- Stage 0: Machine is off except low water light 'may' come on if water tank has low water.
- Stage 1 w/ PID OFF: Brew boiler OFF and steam boiler OFF - used for initial refill without damaging the heating elements in either boiler.
- Stage 1 w/ PID ON: Brew boiler ON and steam boiler OFF.
- Stage 2 w/ PID OFF: Brew boiler OFF and steam boiler ON.
- Stage 2 w/ PID ON: Brew boiler ON and steam boiler ON.
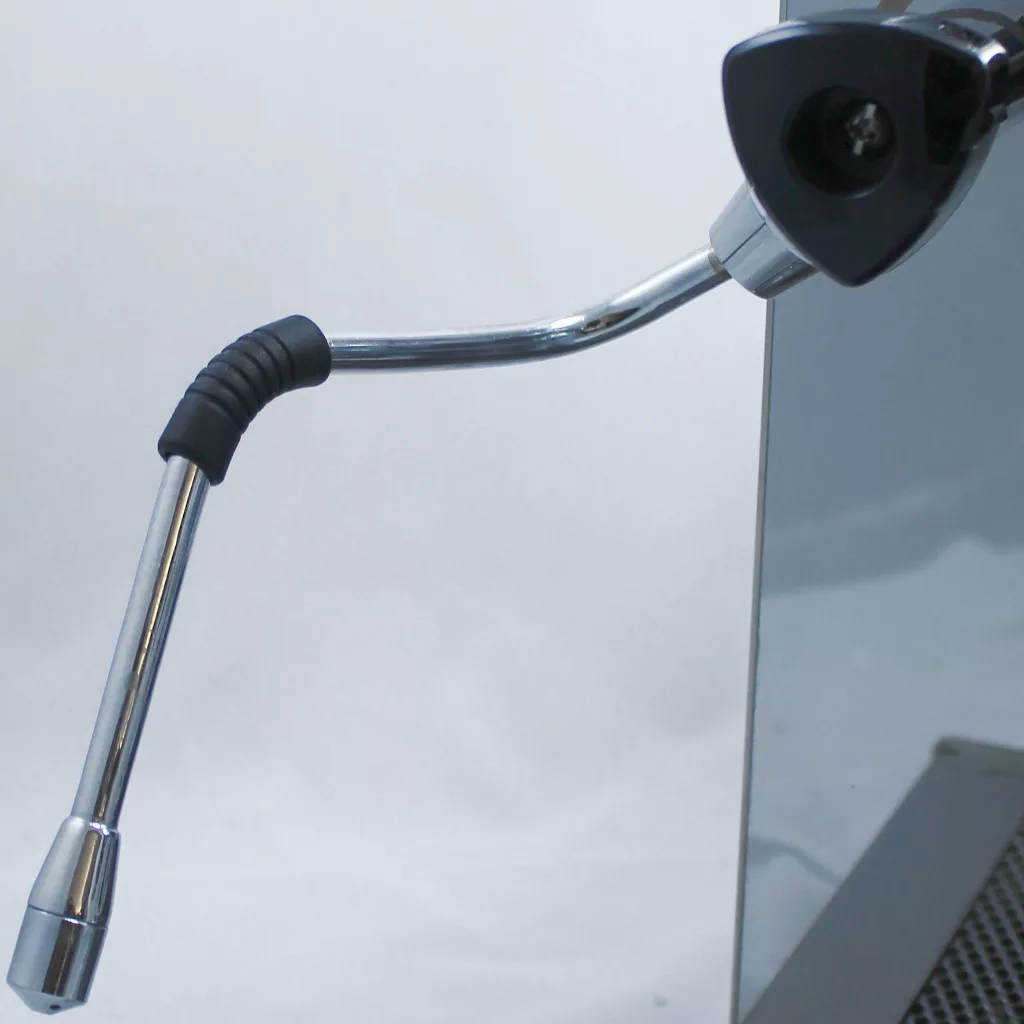
- No burn wands: We have decided to NOT offer no-burn steam wands because the typical internal diameter is about 50% less than a normal steam wand, and this usually affects performance times in steaming. In addition, the grouphead has a much greater area to get burned.
- 220 volt version: Sorry, 220-240 volt units are not available for ordering.
- Some assembly required: Feet are not attached to the machine.
- Direct connect mode:
- Setup: There is a screw in the water tank plate that the user can tighten to hold the plate down so the switch is activated to make the machine think there is water in the reservoir.
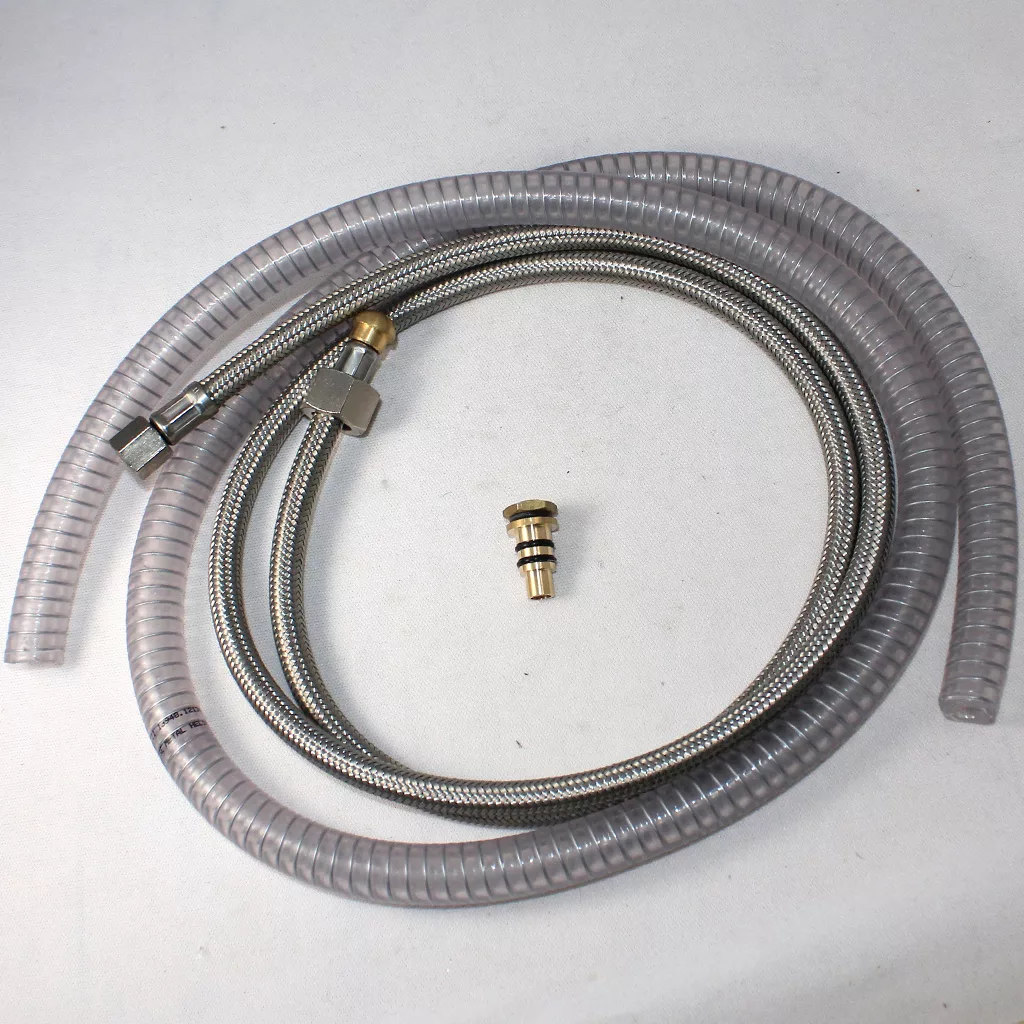
- Connecting water line: Water connection at bottom of machine is in the back left corner ~2" from the rear and ~5 inches from the left side panel. The water connection elbow under the machine is 1/4" male thread. The included stainless steel braided hose, is 46" long and has the female fitting to connect to the water connection elbow. On the opposite end of the braided hose, there is a 3/8" female thread fitting. It is best to purchase the V319 coupling to attach to your water line, and then attach the braided hose to the V319 coupling.
- Draining: This model has the capability to drain or not to drain. There is an included plug on the back of the drip tray. The plug can be removed or installed as desired. The machine's drain pipe can be manually directed to drain either to the right or left side of the machine. In either direction, the drain pipe can be angled 4" from either side. The included drain hose is 46" in length and has a 1/4-3/8th inside diameter which slips onto the machine's drain pipe. The drain hose needs to drop vertically 1" for every 12" it goes horizontal.
- Water line pressure: Should be regulated to be between 35 and 40 pounds for proper operation of this machine. Check with your local plumbing supply to advise on purchase so as to meet any local building codes. In addition, check with them about your local building code may require a backflow preventer (which does not allow boiler water to backflow into water supply).
- Water supply: Connection must be made to a cold water supply line only.
 Backflushing
 Descaling
 Water softening
 Heating element (coffee)
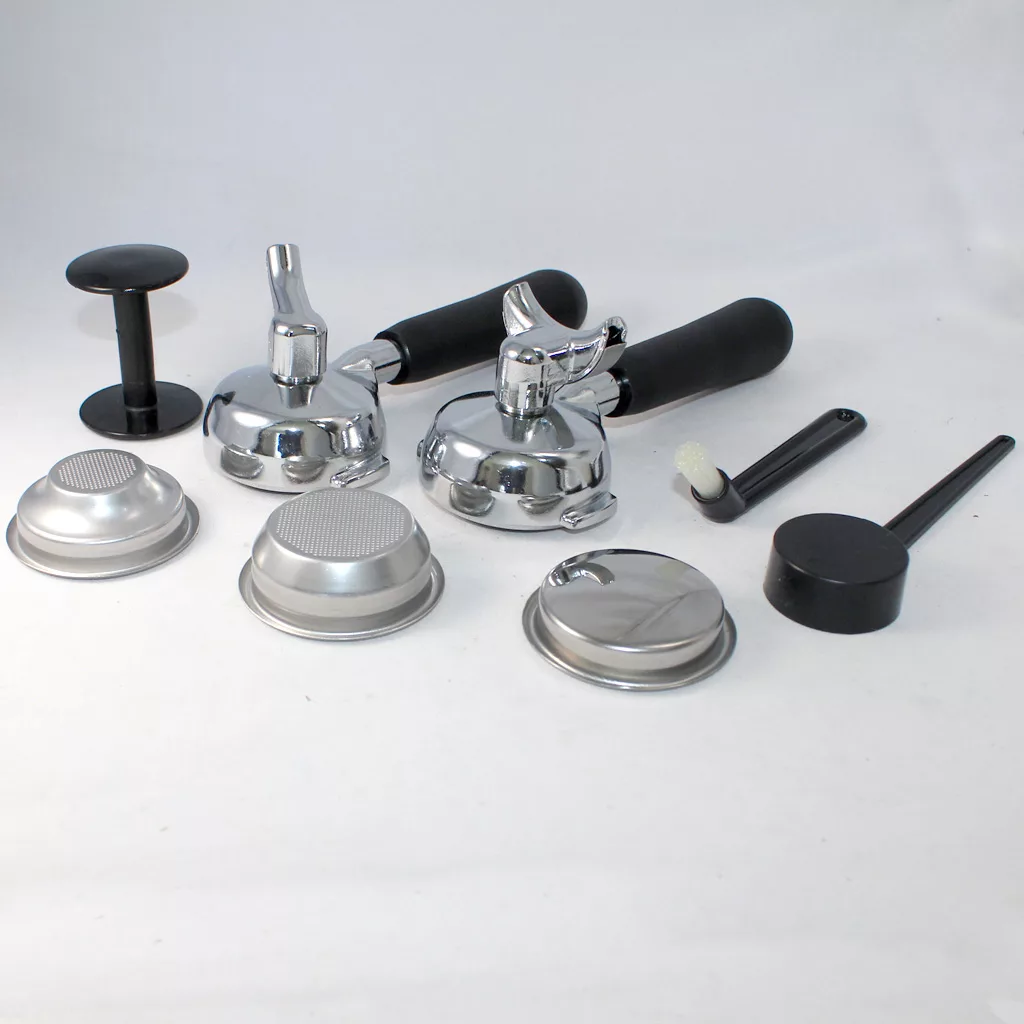
 Shower / dispersion screen
 2-cup portafilter
 Portafilter / grouphead gasket

Customer reviews
Add a review
Ask a question
Please ask follow up questions as a new question. Submitted questions will be first reviewed, answered, and lastly publicized.
-
By steamer keeps heating and pressurizing until the dials and the machine is overheating
-
Q By steamer keeps heating and pressurizing until the dials and the machine is overheating answer nowAsked by on April 21, 2022 4:17 pmAnswered by the admin
The PID sensor needs to be checked for corrosion and cleaned. This is usually the culprit.
Hi there my vbm domobar super db has been showing codes A5. A7. A8 and A9 on and off for a few weeks now, could you please advise me of what the codes are for as I’m far from a espresso machine repair shop.
Any help would be very much appreciated
-
Q Hi there my vbm domobar super db has been showing codes A5. A7. A8 and A9 on and off for a few we...... Read more answer nowAsked by on January 19, 2021 6:53 pmAnswered by the admin
Sorry for the delay as we had to confirm with VBM. There are no such A8 or A9 codes. We have a list of codes in our tech support section.
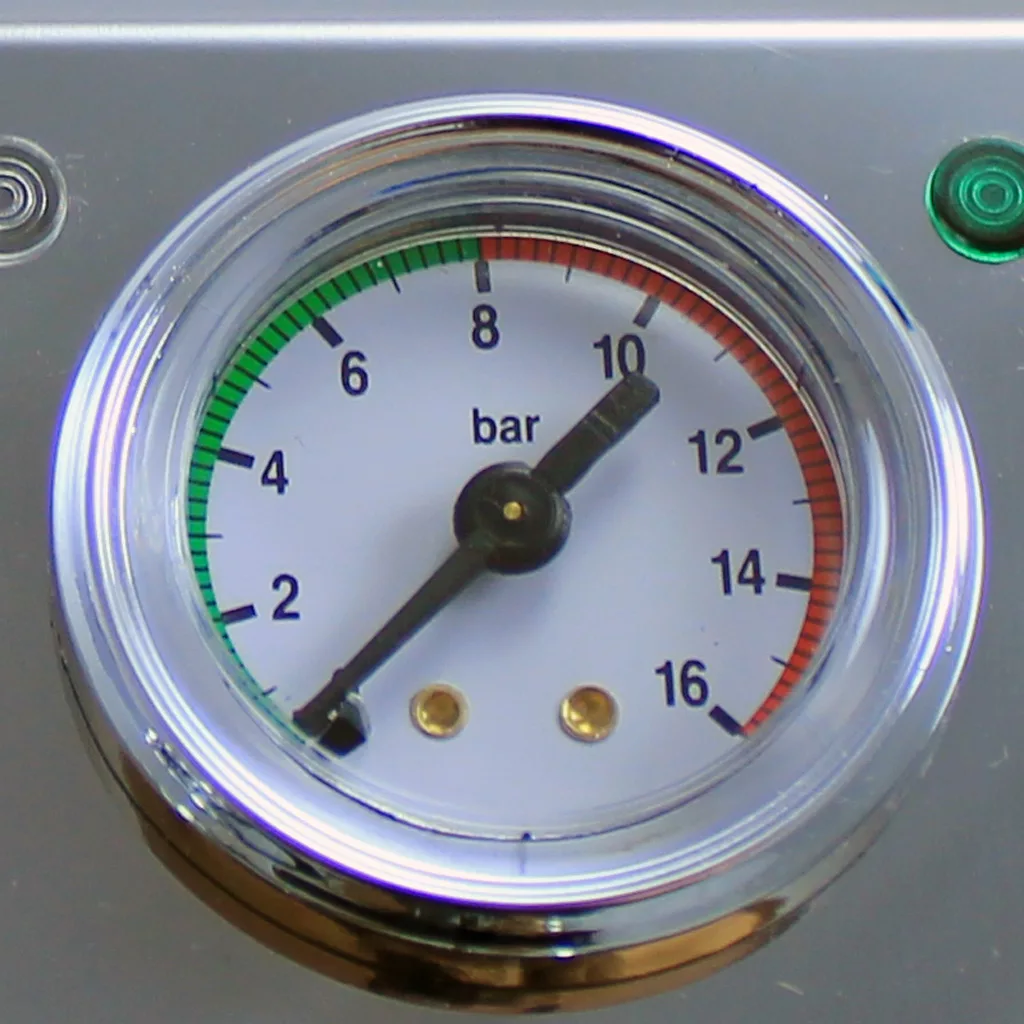
The green light no longer works and the pressure, while it remains between 10-12 --- doesn't distribute an espresso w/ crema as it used to up until last week.
-
Q The green light no longer works and the pressure, while it remains between 10-12 --- doesn't dist...... Read more answer nowAsked by on December 9, 2020 5:50 pmAnswered by the admin
The light may need to be replaced or the power is not sufficient.
As for the espresso, if the brew pressure gauge is reading 10 or more bar, then the fault lies in with the coffee being used.
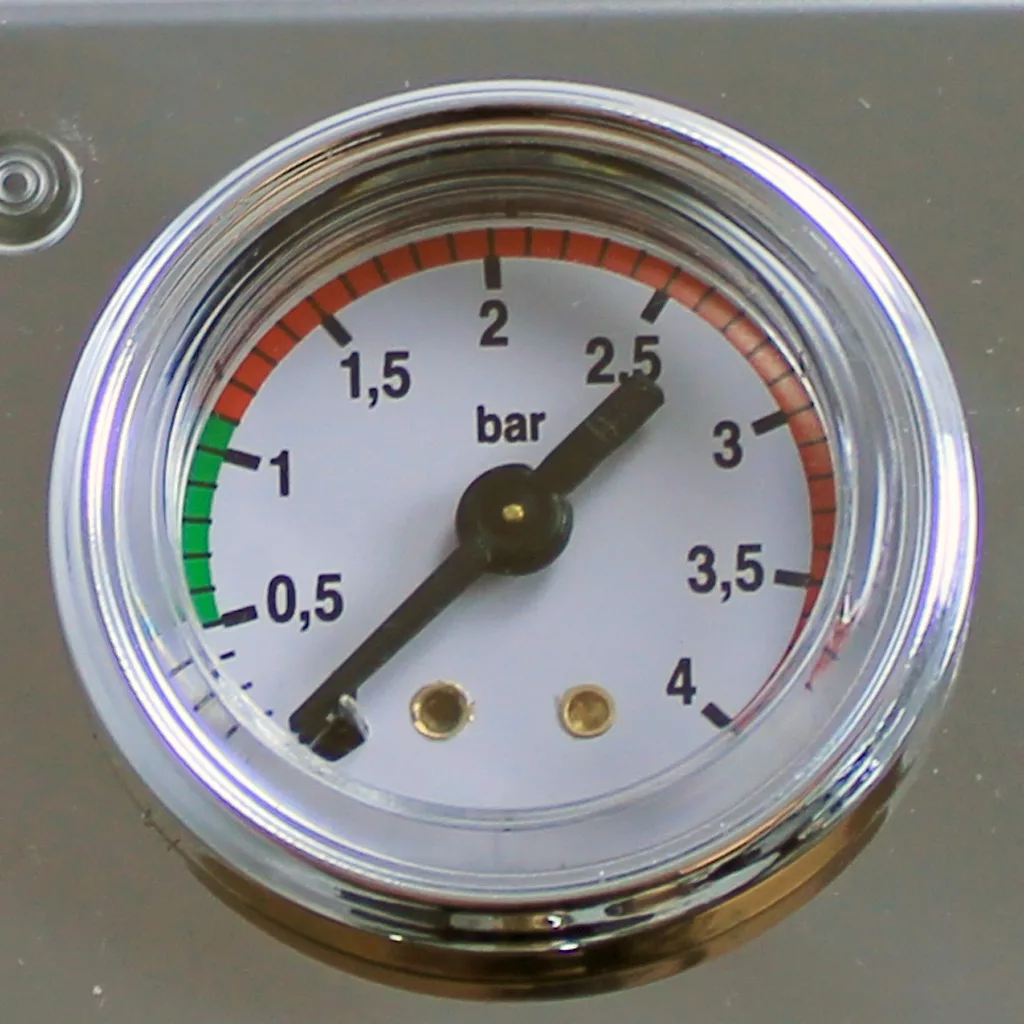
I've got a quick question about my new VBM. The machine arrived in good condition and gave it a test run from the reservoir following the steps on your site and it worked good. I got the machine hooked up to a dedicated water line with a filter, softener, and regulator a couple of days ago and with the regulator set at 2.5 bar it started dumping water through the overfill (? spout in the drip tray ). I reduced all the way down to 1 bar and it continues to flow water out of the overfill. I set the machine back up for running from the reservoir and it seems to run fine.
Not sure if I missed something so I could really use your advice.
-
Q I've got a quick question about my new VBM. The machine arrived in good condition and gave it a t...... Read more answer nowAsked by on October 9, 2020 4:31 pmAnswered by the admin
Sorry for the delay. Please look inside to determine where the flow is coming from.
It could be the steam boiler safety valve or vacuum breaker valve, which means the boiler is overfilling. If the pump is constantly running, then the water inline may be too pure.
It could the the overpressure valve (OPV) which means there is too much in line water pressure which means the inline regulator is not functioning properly. A way to test this is look at the brew pressure gauge when the machine is idle and direct plumbed. If the gauge reads more than 2.5, then your regulator is faulty.
In tank mode, put in a blind filter and run the grouphead (lever up) for 45 seconds. If the max pressure reaches 9 bar on the brew pressure gauge, then the OPV is not faulty. If it does not go over 9 bar, then the screw on the OPV may be tightened clockwise.
I purchased this machine about 10 years ago. The pressure gauge (when drawing shots) has always been on 12; now it is on 7 to 10). Could you tell me if this is a problem, and what I might do to bring the pressure up to its earlier level. Thank you.
-
Q I purchased this machine about 10 years ago. The pressure gauge (when drawing shots) has always b...... Read more answer nowAsked by on August 17, 2020 5:36 pmAnswered by the admin Please check with the blind filter in place. If the gauge goes over 9 bar with the blind filter, then it is a grind issue. If it does not, it can be a pump, gauge, or overpressure valve (OPV) issue or a combination thereof.
Loving my machine.
For the life of me, could not find the screw that holds the water filler plate in place when hooking up to a water line.
So far we're using the reservoir, but hooking to a water line is in our future.
Can you send one of those please?
-
Q Loving my machine. For the life of me, could not find the screw that holds the water filler plate...... Read more answer nowAsked by on June 19, 2020 6:29 pmAnswered by the admin
This part was in the small bag in the drip tray that had the components to drain your drip tray.
the seam boiler is not get power i check it with my tester ... no heat up
i change the cpu control board ..
i took the water out and the clean the level probe and putting back and stop working .
-
Q the seam boiler is not get power i check it with my tester ... no heat up i change the cpu contro...... Read more answer nowAsked by on June 5, 2020 3:12 pmAnswered by the admin
Other electrical components will need to be checked with a multimeter. It could be the switch is not in position 2 or the maybe power switch is defective. Sorry, electrical problems are difficult to diagnose and determine remotely.
I purchased a Vibiemme Super Double Domobar version 3 or 3.5 from you in 2013. It is plumbed in. About two weeks ago I noticed condensation and a pool of water beneath the machine, however everything still functioned. I descaled, adjusted the pump pressure and the opv (12 bar as the machine is heating, 4 bar line pressure, 8.5 bar flushing, 9 bar blind portafilter, the PID and a grouphead thermometer match nicely).
After two weeks of fantastic coffee, this morning I have a puddle: a steady stream of water into the drip tray and leakage from the steam boiler safety valve. I disassembled the OPV and it appears clean. I pulled the steam boiler water level probe and it too seems scale free but the tank was overly full.
I tried re-descaling. Running from the tank instead of the house line, the steam pressure seemed normal and the tank did not over-fill (but perhaps because I kept draining it). While descaling the brew boiler, I hoped to be able to re-adjust the OPV, previously disassembled, but the brew pressure never increased beyond 2 to 4 bar as the machine warmed and almost no water dripped into the tray no matter how much I screwed in or out the OPV.
Re-plumbed, it did not take long for the steam boiler to apparently over-fill : steam pressure reads 2 bar, steady stream into the drip tray, the steam boiler safety valve leaks, and water not steam comes out when I open the steam wand.
I have connected back to the water tank and let the machine idle for three hours. Brew pressure gauge sits at 2 bar, even during warm-up, and goes to 8 when the pump is activated. After about an hour water has built up in the opv tubes but is not steadily flowing into the drip tray as when plumbed. However, with the pump activated the water jets out of the OPV tubes into the drip tray. Water is coming out of the group head extremely hot (200 degree on the PID, 215 at the grouphead - not sure how much more I can open the opv). Steam boiler pressure stays under 1.5 bars unlike the 2 bars when plumbed.
Help!
-
Q I purchased a Vibiemme Super Double Domobar version 3 or 3.5 from you in 2013. It is plumbed in. ...... Read more answer nowAsked by on May 9, 2020 2:43 amAnswered by the admin
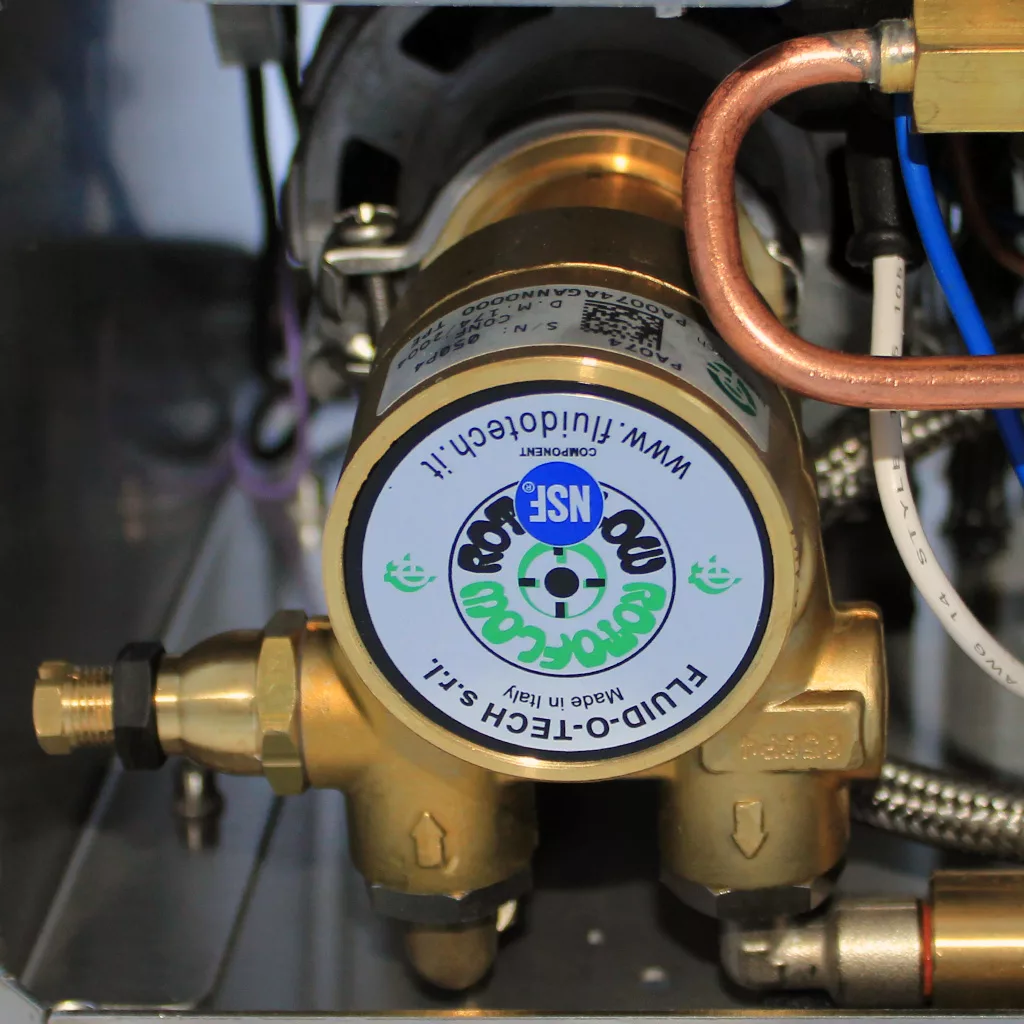
It sounds like the water pressure is too high now, or the solenoid valve for the boiler refill is not sealing properly.
I have a 2012 VBM DB. Two questions, 1) On power-up, the startup cycle will show the version 1.03, shut down and recycle. This happens if I turn the switch to brew boiler or brew + steam boiler. After about 3/4 attempts the machine powers up and starts heating. 2) Steam leaks out internally, on occasion and I note the pressure into the red ~2.0 bar. I have descaled and flushed the Jaeger Pressurestat, but still have this intermittent problem.
-
Q I have a 2012 VBM DB. Two questions, 1) On power-up, the startup cycle will show the version 1.03...... Read more answer nowAsked by on April 6, 2020 4:21 pmAnswered by the admin
This may be multiple issues.
The overheating is a limescale issue causing the pressurstat to stick and not cutting off the power to the heating element when it reaches proper steam pressure - on the older units, it should not go over 1.4-1.5. A full descaling is needed as well as a replacement pressurstat change AFTER the descaling.
The other issue is electrical or electronic. It could be the relay(s) on the floor, the safety thermostats, the brain unit, the display, and/or the power switch are intermittent defective. This can be a needles in the haystack. If the brain unit shows any sign of melting, it could be that. If the display has disfigured letters/numbers, it could be that. The relay on the floor could show green or red. Least likely is the power switch. It becomes a guess of changing one part out at a time in this case.
The espresso side of my machine is now working like new.
The steam boiler on the other hand will not produce any heat.
The pilot light turns on when I put the switch in the "II" settings, but the boiler will not heat at all.
I removed the relay cover and the red light never turns on.
I disconnected the water sensor and turned the machine to the "I" position and the pump did start filling water until I re-connected it.
I measured 1.7 V on the relay control connectors, when the machine is in "I" and in the "II" position and after it was already hot for 30 minutes.
It is 5V when not connected to the relay and 1.7 V when connected
Is there something else that I am missing?
What other measurements can I make to diagnose the problem? Can it be a defective part?
-
Q The espresso side of my machine is now working like new. The steam boiler on the other hand will...... Read more answer nowAsked by on January 23, 2020 7:07 pmAnswered by the admin
Sounds like the relay is bad. However, the manufacturer does not provide voltage specs. You can compare the coffee boiler relay on the floor. The red light should be on.
Otherwise, bad heating element or brain unit.
Starting last month, the steam / hot water boiler would take > 2 hours to heat up & generate steam instead of the usual 30-45min. Finally it gave up on me & the steam boiler (the big one) wouldn't heat up at all after left "ON" for hours. The amber light next to pressure gauge is blinking, indicating that the boiler should be heating up but it doesn't. Upon visual inspection inside, I couldn't find any melted plastic or melted wiring. Thinking the problem might be the heating element, I physically pulled out the heating element & tested for continuity. I don't have electrical background, but the volmeter reads around 13 ohm when I connect the 2 voltmeter sensors to the plugs at end of heating element. When touching only one plug & second sensor on physical coil, I get a zero reading. Having that said, does my heating element need replacing? If not what else can I try. Thank you!!
-
Q Starting last month, the steam / hot water boiler would take > 2 hours to heat up & genera...... Read more answer nowAsked by on November 16, 2019 9:45 amAnswered by the admin
It sounds like the heating element is good. Try resetting the safety thermostat.
The brain unit may not be sending power to the heating element, or the step down relay went bad. Otherwise, it could be the PID sensor in the steam boiler. The only way to test these is by replacement.
I tried the blind filter and there is zero bars of pressure. I do not have a water softener attached. I descaled the machine a few months ago and only use bottled water in my machine. The machine was working fine yesterday and had normal pressure. Water will come out but at very low pressure.
-
Q I tried the blind filter and there is zero bars of pressure. I do not have a water softener attac...... Read more answer nowAsked by on October 8, 2019 6:55 pmAnswered by the admin
It may be a failing pump, a failing gauge, or a clog in the grouphead. We suggest descaling again.
I have a Domobar DB that i bought about 8 years ago from you guys.
When I turn the machine on, everything is OK and it heats up to the correct temperature, but after bein on for about 20-30 minutes, the heater part and the PID stop working and the machine cools down.
When it cools down a bit, everything starts working again.
The pump works all this time even when the PID display is off.
Any clue on how to fix this?
-
Q I have a Domobar DB that i bought about 8 years ago from you guys. When I turn the machine on, e...... Read more answer nowAsked by on September 27, 2019 6:44 pmAnswered by the admin
It sounds like the black electronic board needs replacement. There are different versions. Hence, you will need to email us the label on your current board for correct match up.
The hot water boiler does not refill. My VBM is in service locally here in Melbourne, FL. The repairman has said I need a Cigar Auto leveler. The hot boiler is not refilling by itself. I have tried to locate the part on your website, but could not find it.
-
Q The hot water boiler does not refill. My VBM is in service locally here in Melbourne, FL. The rep...... Read more answer nowAsked by on August 19, 2019 4:48 pmAnswered by the admin
Every Gicar brain unit has a code as different version of the same mdoel machines may have different codes. The code needs to be searched on our web site. It can look something like xxx.xxx.xxx.xxx where there are 4 sets of numbers separated by 3 periods. Each set can have 1, 2, or 3 digits. At the end could be a letter.
While giving my machine an extensive clean I noticed some O-ring debris in the goup head lever harm located in one of the two grooves. One O-ring was missing and the other was degraded. Referring to your parts diagrams, none of them appear to reference o-rings in the group head lever arm. Can you please advise if this is the case, meaning that rubber debris originated from somewhere else.
Thanks for your help and support.
-
Q While giving my machine an extensive clean I noticed some O-ring debris in the goup head lever ha...... Read more answer nowAsked by on March 11, 2019 4:02 pm
Hi, we bought one of these from your store in August, and we have an older version of this same machine (10y old) that is still going strong. Love the machines. However, this new one is suddenly discharging water from all three ports (steam, hot water, main espresso outlet in the middle) that is "dirty." It acts as if there is some sort of internal charcoal filter that is leaching charcoal into the water. It only started doing this in the last month or so. The unit is direct plumbed - I disconnected the water line from the machine and opened the line up and the water from the line is clear (as is the sink water, off of which the line is plumbed) - this means it is something in the machine itself. Is there a hidden charcoal filter? Or could it be faulty rubber seals that are deteriorating? I have run the water through the different outlet ports on the machine on several different days to see if the water clears, but it doesn't. Very strange. Thoughts???
-
Q Hi, we bought one of these from your store in August, and we have an older version of this same m...... Read more answer nowAsked by on February 9, 2019 7:14 pmAnswered by the admin
We have seen strange scenarios of discolored waters from different machines. There is no charcoal in any of our machines. In most cases, it is the machine reacting with the water being heated. We have seen small black particles, white particles, and sometimes green and bluish particles.
From what we have seen, there are only black orings in the steam and hot water valves. If these were breaking up, steam and hot water would be leaking from the wand tips.
Please keep in mind that we test every Vibiemme double boiler espresso machine with our softener water, and then we drain the water. If there were any particles, we would have seen them.
We suggest changing your water by using the reservoir for a few weeks to see if it clears up.
How long do you have to let the machine warm up prior to use? If more than 5 minutes, is there a feature to program it to turn on each morning at a set time?
-
Q How long do you have to let the machine warm up prior to use? If more than 5 minutes, is there a ...... Read more answer nowAsked by on January 2, 2019 3:18 amAnswered by the admin
Coffee boiler only, 20-25 minutes.
Coffee and steam boilers, 45 or more minutes.
You can use an external timer to power on/off the machine. However, it is important to place a surge suppressor (1080 joules or higher) between the machine's plug and the timer to reduce electrical issues on the machine.
I'm looking for a way to descale the machine. Looks like I have a version 3 machine, it's about 7 years old. The original manual does not mention descaling at all. Is there any other maintenance that needs to be done regularly other than descaling and back flushing?
-
Q I'm looking for a way to descale the machine. Looks like I have a version 3 machine, it's about 7...... Read more answer nowAsked by on December 14, 2018 2:53 pmAnswered by the admin
We usually do not recommend a descaling unless needed to solve a problem. It is better to treat the water by softening it. If you need to descale, please follow these instructions.
Machine is constantly leaking water in the drip tray from the valve on buttom left corner of drip tray (not the grouphead). The machine is plumbed & pressure is barely 2bar, however leaking also occurs when water source is the tank.
When I empty the boiler & leave the machine off, the leaking stops for several hours but then it starts leaking again without the machine being turned back on. Lately I've also stopped hearing the sound of boiler filling up on daily use unless I completely drain it and turn the machine back on…
I am assuming that somehow while the machine is off, the boiler gets filled & possibly overfilled by itself? Is it normal for boiler to be filled while the machine is off? Having that said I was hoping to get your opinion of what might be the cause & what part I need to order / replace?
-
Q Machine is constantly leaking water in the drip tray from the valve on buttom left corner of drip...... Read more answer nowAsked by on April 4, 2018 5:28 pmAnswered by the admin
First step, please descale your machine in tank mode. Remove body cover by removing three screws on each side. Follow the hose behind the spout and look for the source of where the water is coming from.
Second step, test the machine in tank mode with the plumbing disconnected from the machine and power off. There should be no leaks.
Third step, power on machine for several hours and look for the leak in the hose. If there is a leak, then the boiler may be overfilled or the boiler refill valve is partially open allowing water to back track to the OPV. If there is water exiting the safety valve or vacuum breaker valve on top of the boiler, then the boiler is overfilling which points to a bad sensor, bad brain unit, or faulty wiring.
Fourth, if no leaks in tank mode, reconnect direct plumbing water supply and leave power off. If it leaks, then to points to the OPV (check hose to drip tray spout) or overfilling of boiler as described above. If no leaks, power on and check. If it leaks at this point, then it is most likely an overfilling boiler.
You can check for an overfilled boiler (steam side) by removing slowly hot water from the hot water spigot. Within a few ounces, the pump should kick in. If not, then the boiler could be overfilled.
As soon as the pump kicks in, shut the hot water valve. In a few seconds, the pump should stop. If the pump stays on, it could be overfilling the boiler. To physically check, the machine needs to be cold , unplugged from the electrical outlet, and the direct water supply turned off, then remove the vacuum breaker valve and inspect visually.
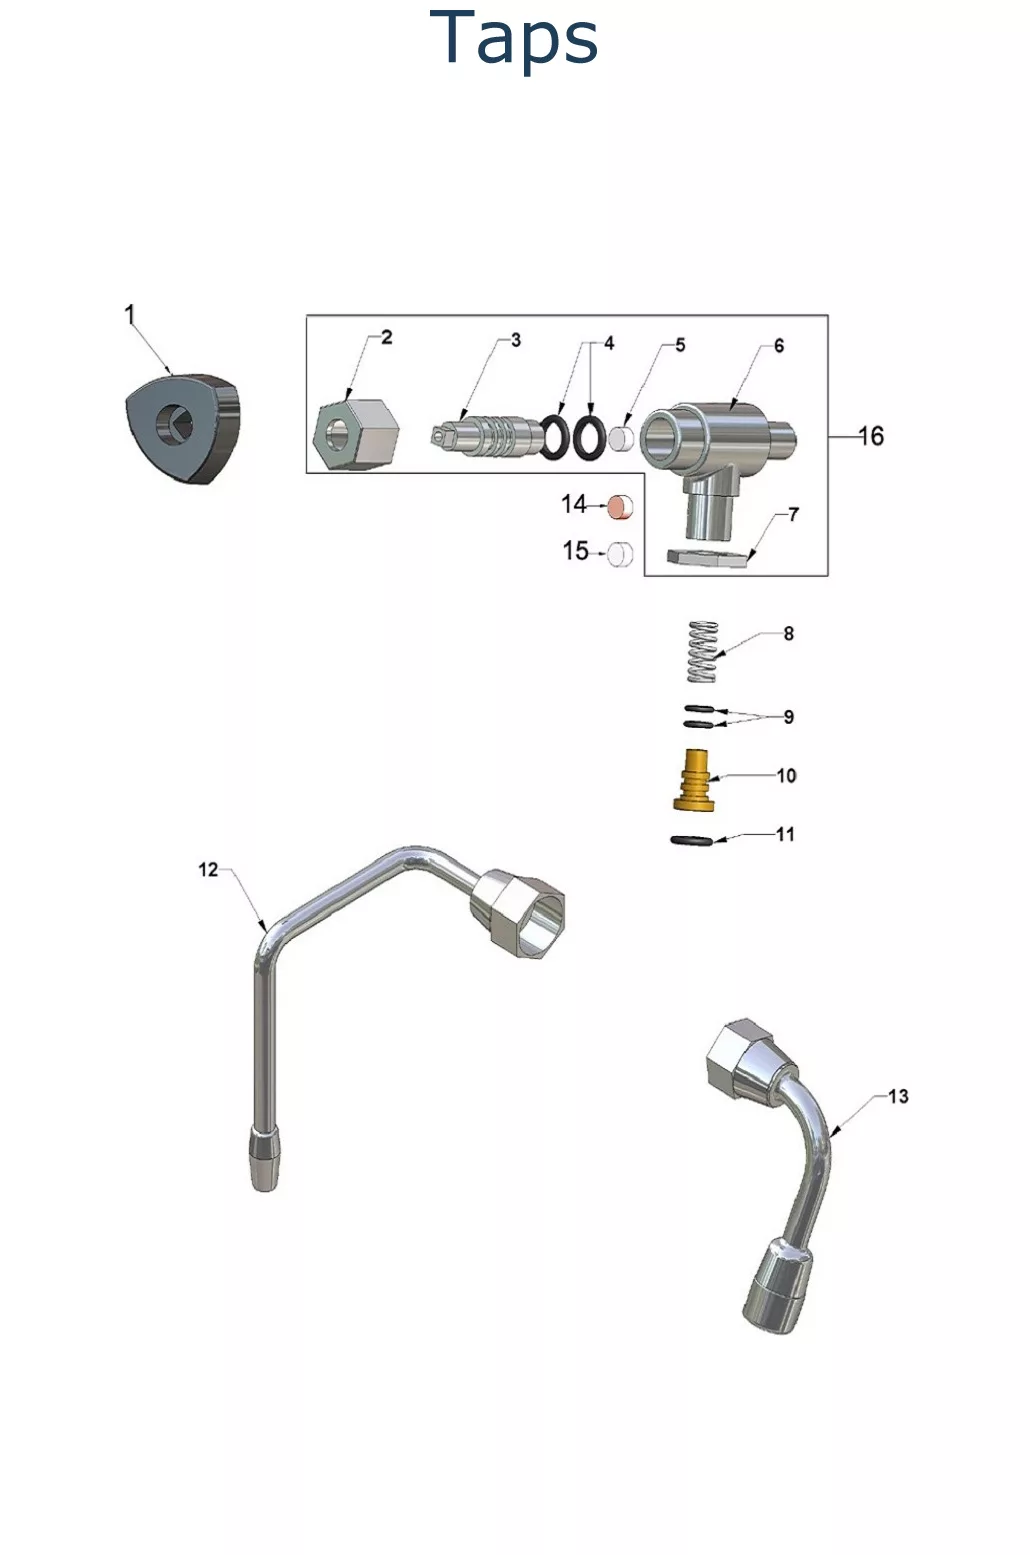
There are constant drips from water tap and steam tap. I think I need to replace the seal gasket from the end of the shaft in hot water/steam valve. Can you please tell me which one will be appropriate for my machine?
-
Q There are constant drips from water tap and steam tap. I think I need to replace the seal gasket ...... Read more answer nowAsked by on November 29, 2017 6:33 pmAnswered by the admin
Please review the procedure here. It is very important that you check which gaskets is in your machine BEFORE ordering.

11 reviews for DISCONTINUED VBM Domobar Super V4 Dual Boiler PID Switchable Espresso Machine